Step 1: Create a New Page
- Log in to your Tagboard account.
- In the top-left corner, click on the ➕ Create New button.
This will display a new window of all the things you can create within Tagboard Creator.
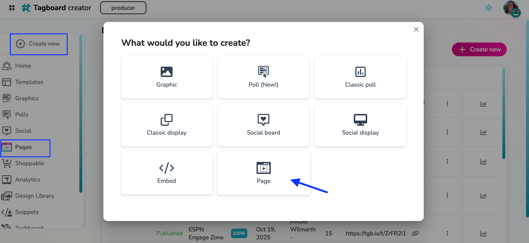
Step 2: Select "Page"
From the list, select Page. This is where you'll start building your new page. You can also click into the Pages tab to create a new page or access an existing one.
Step 3: Choose a Starting Point
Decide how you want to begin your page. If you're starting fresh, select Build From Scratch. If you have an existing page you'd like to duplicate, select Copy From Existing.
Step 4: Name Your Page
Enter a name for your page. Remember, this name will appear on the browser tab when users visit your page. You'll have the option to update this name later in the builder.
Step 5: Customize Global Settings
In the General tab, you can customize global settings for your page. This includes setting the background, where you can choose either an image or a color.
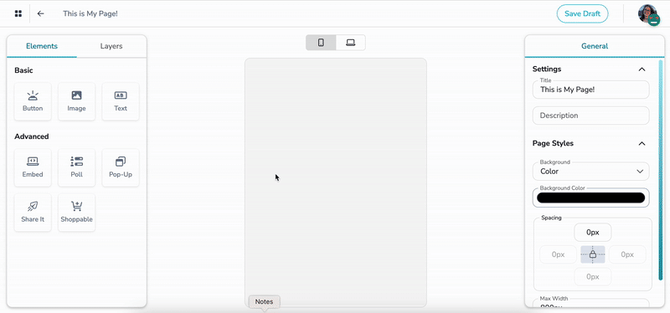
Step 6: Start Building Your Page 🏗️
Go to the Elements tab and select your first element to add to your page. This is where you begin to shape your content.
Elements to choose from:
- Basic: Button, Image, Text
- Advanced: Embed, Poll, Pop-Up, Share It, Shoppable
Note: Ensure to look out for ⚠️ required fields before being able to save or publish your page.
Step 7: Customize Your Page 🎨
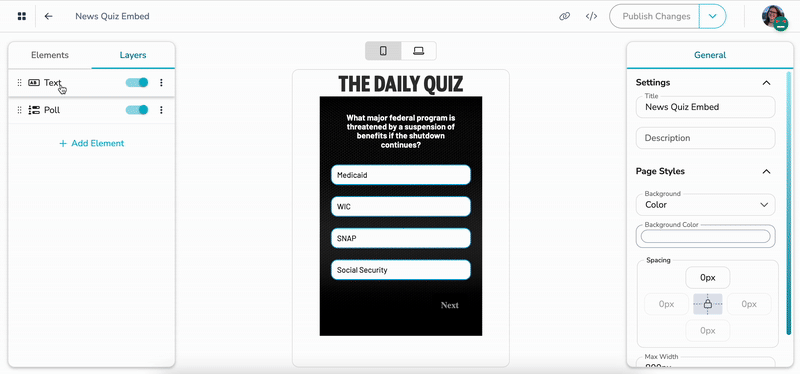
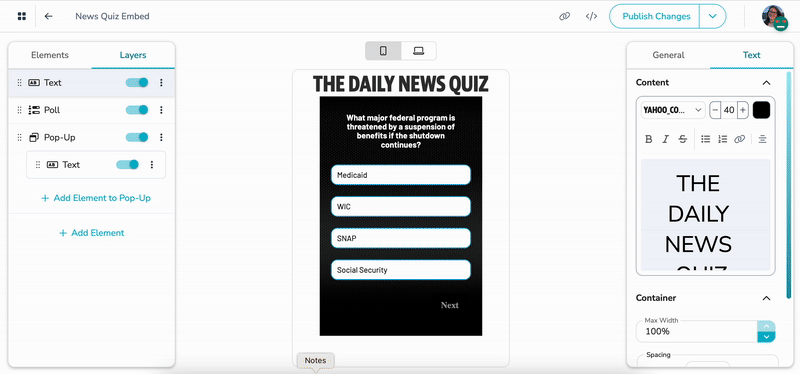
Click on the Layers tab to see all the elements on your page. Select the layer you want to customize, and the corresponding settings panel will appear on the right. Here, you can adjust settings such as size, position, color, and more to refine each element.
Step 8: Save as a Draft 📝
Save your progress by clicking Save Draft in the upper right. This ensures your changes are preserved, and you can continue editing before publishing your page.
Step 9: Publish Your Page
When you’re satisfied with your page, click the dropdown menu next to Save Draft and select Publish. This will make your page live for others to view. You can either use the landing page as its own website or embed it into your existing website or app. Click the copy button to copy the url or click the embed code button to access, customize and copy your embed code.
Step 10: Celebrate Your Achievement 🎉!
Congratulations! You’ve successfully published your first Tagboard Page. Your page is now live and ready for the world to see.
Feel free to return to your page anytime to make updates or changes. You can always save changes as a draft before making them public.