NDI - Outputting Tagboard as NDI via OBS
Outputting Tagboard as NDI requires downloading and running software on your output computer designated to run Tagboard's output. Download links are included in the steps below. The software is built by OBS and NewTek. It works best when running the most up-to-date version of OBS.
Step 1
Download OBS here. If you already have OBS downloaded, then please ensure you are on the most up-to-date version. See "Downloading & Updating OBS" if you need help discovering which version of OBS you are running.
Step 2
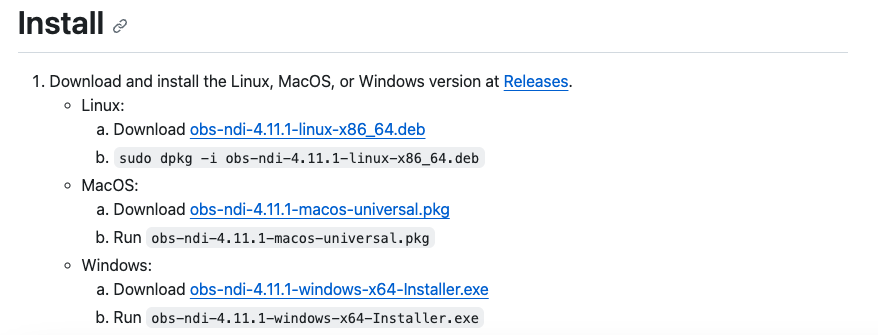
Download whichever version is appropriate for your output computer from this OBS-owned public github webpage. The applicable section of webpage should look similar to the image below. Install and run once downloaded.
Step 3
Download, install, and run the NDI 5 runtime that is appropriate for your output computer. [This will be second step from the same webpage referenced in Step 1.]
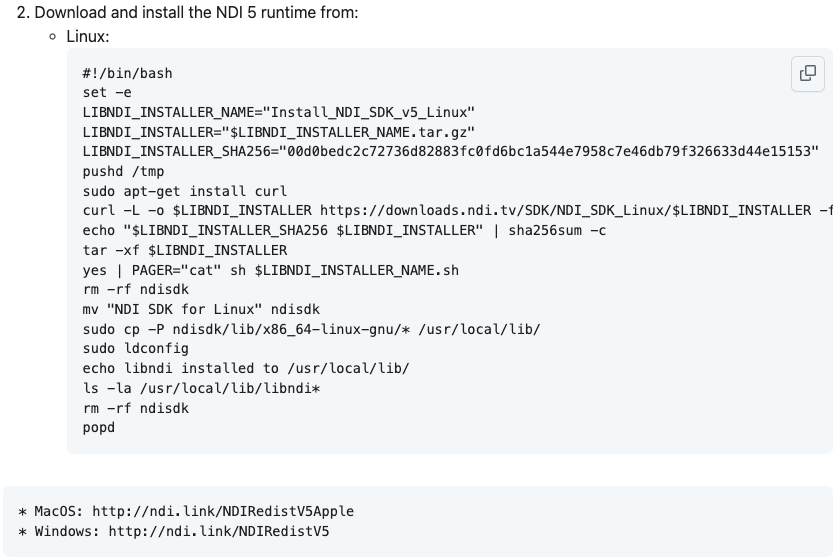
After completing Steps 1 - 3 (above), close and re-open OBS to ensure the correct tools are available when in OBS' interface.
Step 4
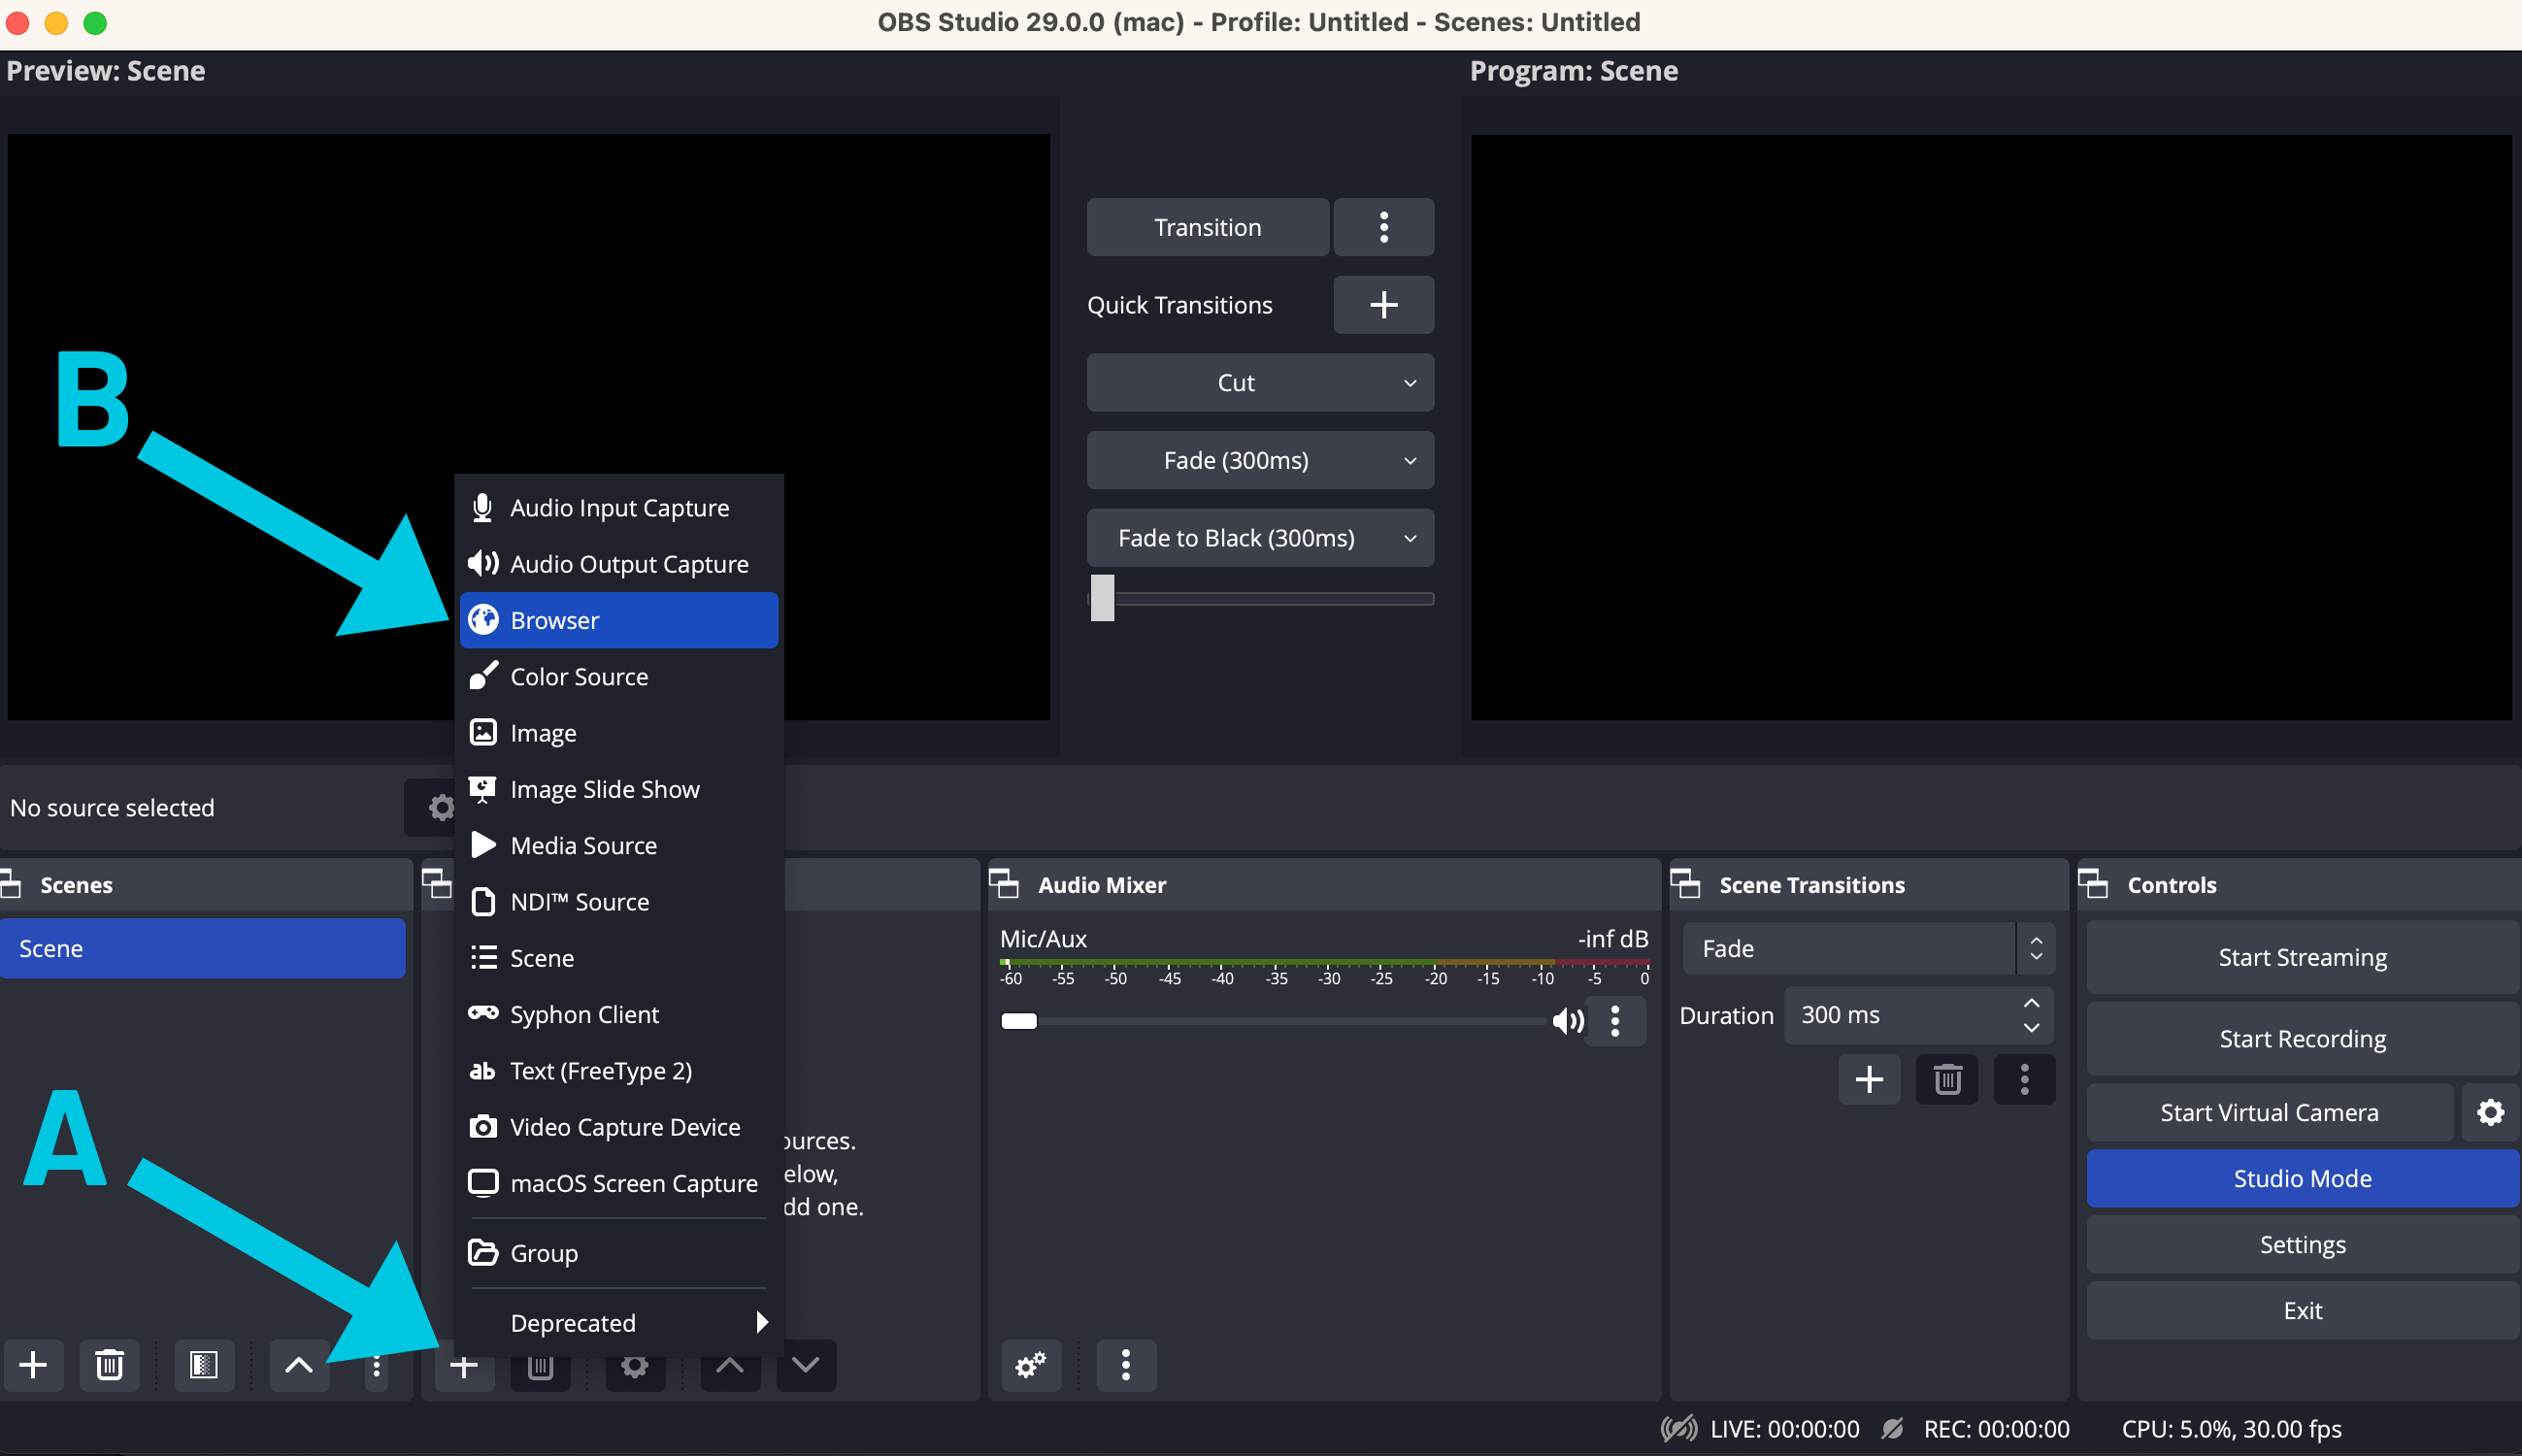
Open OBS, click 'Add Source' [A, below] and then select 'Browser' from the menu [B, below].
Step 5
-
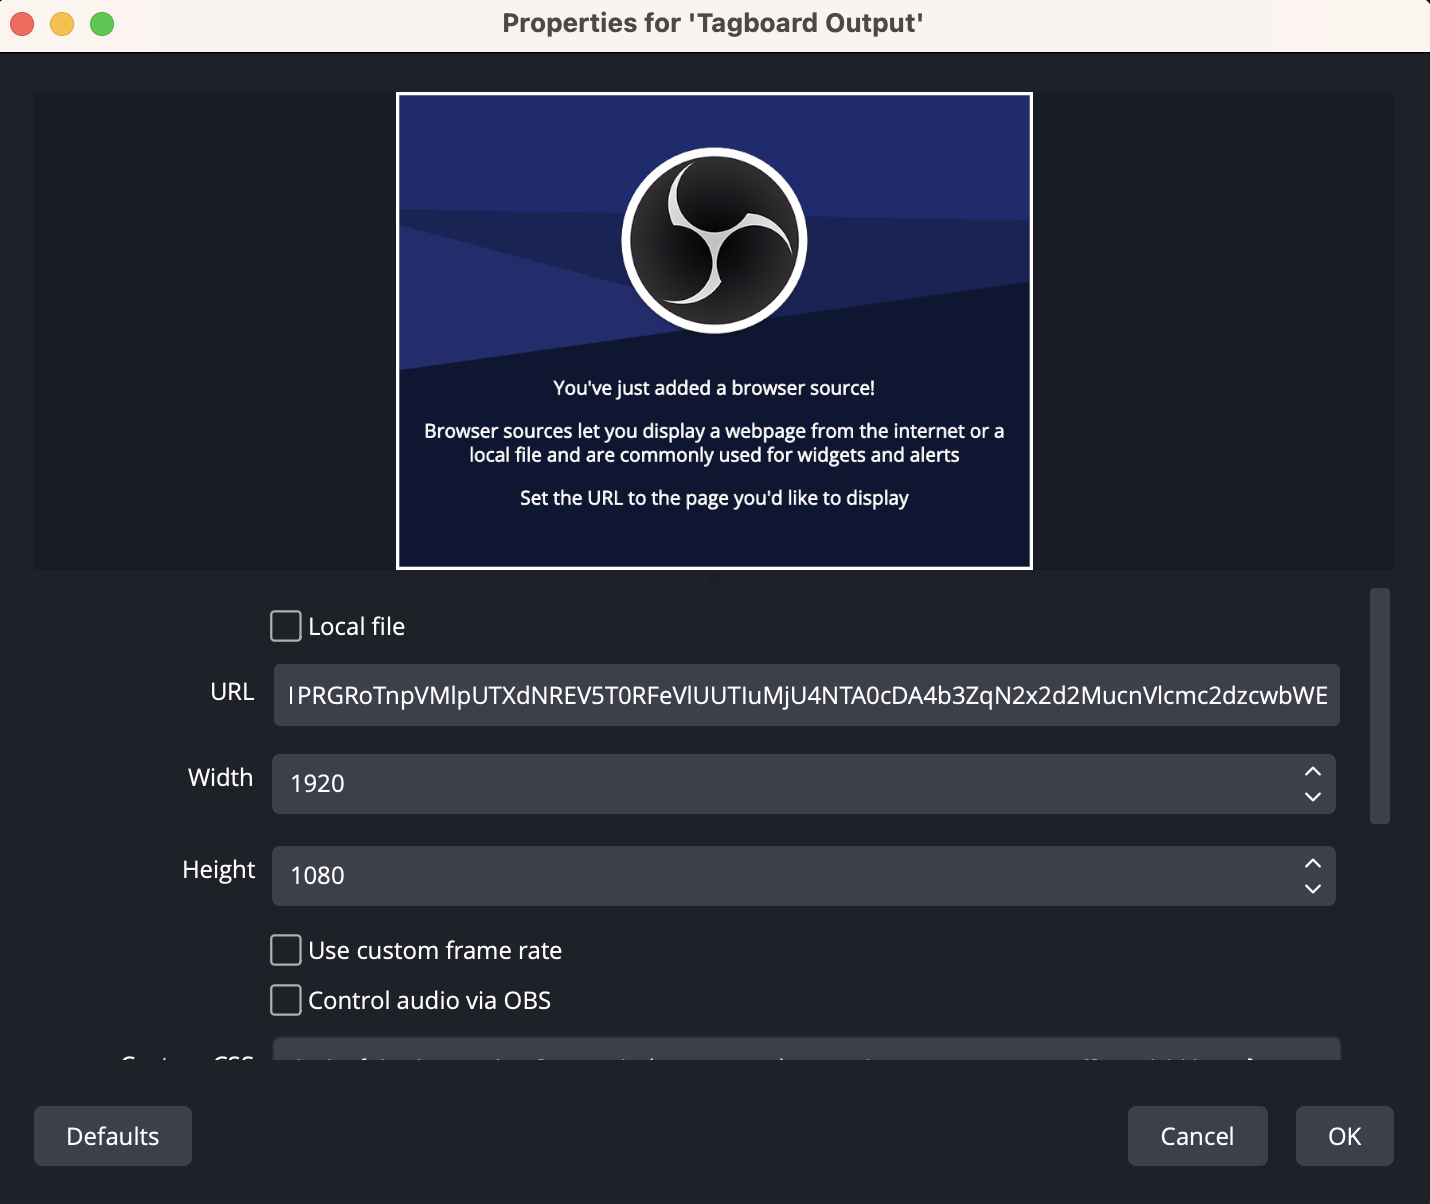
Copy and paste your Tagboard output URL [see "Manage Live Display Output(s)" to find your output URL] in the URL box within OBS.
-
Change the Width and Height to 1920x1080, respectively.
-
Click 'OK' in the bottom right corner.
Step 6
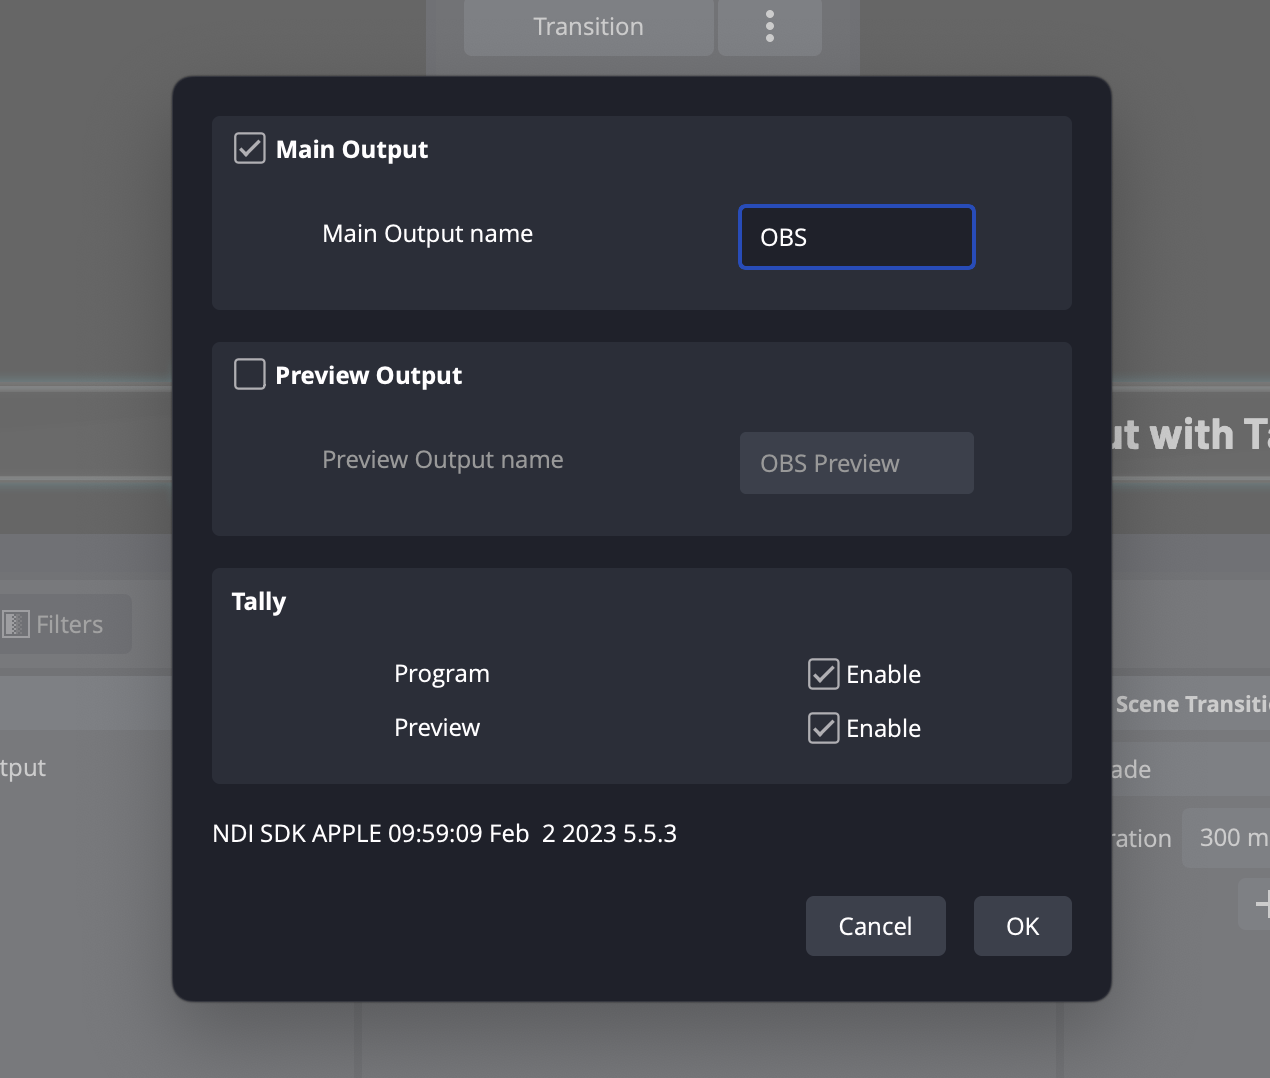
Click 'Tools' on the toolbar, and select 'NDI Output Settings' from the Tools dropdown. This is where you can confirm/edit the name of your now discoverable NDI output. The default name is "OBS", but can be edited here. Click OK when finished.
Once completing all the steps (1 - 6) above, you now have a discoverable NDI Tagboard output via OBS that can be brought into any NDI-compatible switcher!
Step 7
The final step is adding the NDI Feed to your panel! Here is a Ross Video Resource that walks through exactly how to plug a NDI feed into a Carbonite Switcher.
.png?width=300&height=50&name=kb-logo-alt%20(1).png)