.png?width=300&height=50&name=kb-logo-alt%20(1).png)
Show Builder is where you put a show together before it ever hits Producer. Add your segments, load in the graphics, custom scenes, media, and markers you need, and get everything in order so you're not scrambling to build a rundown live. Use the table of contents below to jump to a section.
- Step 1: Open Show Builder
- Step 2: Create a Show
- Step 3: Build Out Segments
- Step 4: Add Content to a Segment
- Step 5: Reorder and Organize
- Step 6: Save Your Show
- Step 7: Handle Broken Assets
- Step 8: Send Your Show to Producer
Open Show Builder
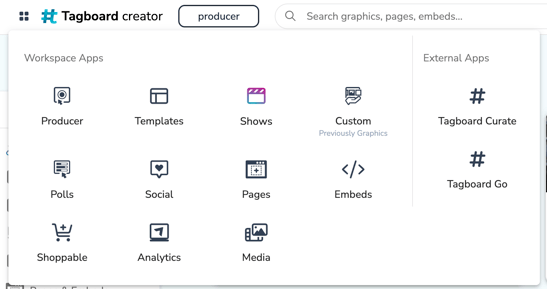
Select the grid icon in the top banner to open the applications menu, then choose "Shows." (If you have a persistent left-hand nav enabled, "Shows" lives there too.)
Create a Show
Start a New Show
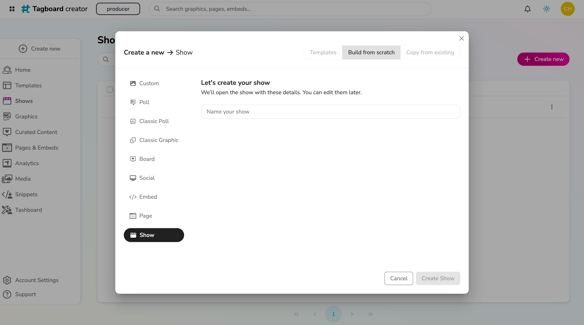
- From the Shows list, click "Create new."
- Give it a name.
- Click "Create Show." You'll land directly in Show Builder.
Show creation only asks for a name up front. You'll add a description and tags in the next step, once you're inside the show.
Edit a Show's Name, Description, or Tags
Click the pencil icon next to the show's name (top left of Show Builder) to open its details. From here you can edit the name, add a description, and add tags. This is also where you'll add the description you skipped during creation.
Build Out Segments
Segments break your show into sections, like blocks in a rundown, so you can group related content together.
Add a Segment
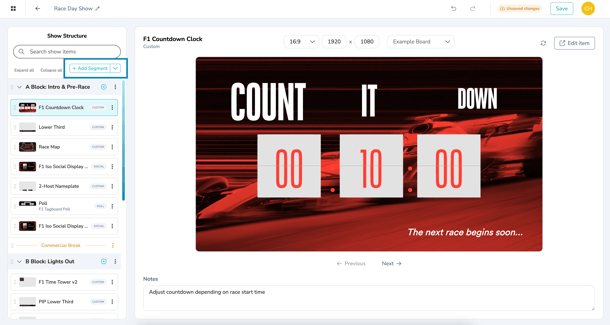
Click "+ Add Segment" to add a new segment to your show. The caret next to the button opens a dropdown where you can add a Segment or a Marker. Markers added this way sit at the top level of your show, outside any segment.
Rename a Segment
Double-click the segment's name to edit it inline, or click the three dots on the segment and select "Rename."
Collapse or Expand a Segment
Click the arrow on the left of a Segment's header to collapse or expand it. Handy once a show has a lot of content and you want to focus on one section at a time.
Duplicate or Remove a Segment
Click the three dots on a Segment for "Rename," "Duplicate," or "Remove." Duplicating drops a copy directly below the original. Removing a Segment takes it and everything in it out of the show, but it doesn't delete the underlying Graphics, Custom Scenes, Media, or Markers themselves.
Note
Removed a Segment by mistake? Click Undo in the top toolbar. Undo/Redo apply to any change in the show, not just removals.
Add Content to a Segment
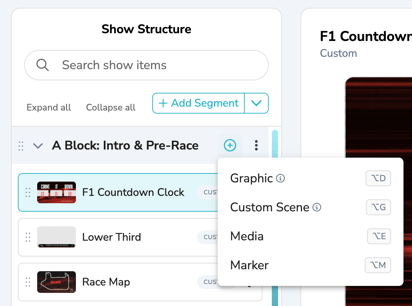
Click the "+" on a Segment to open a dropdown with your content options: Graphic, Custom Scene, Media, and Marker.
Graphic
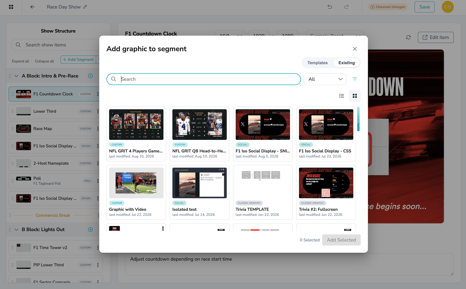
Opens the Graphic picker, which has two tabs.
- Templates: Start from a template instead of building from scratch.
- Existing: Browse or search your existing content by tag or type.
"Graphic" here is the umbrella for everything visual: Custom Graphics, Classic Graphics, Social, and Poll content all show up in the same picker, with a type filter and tags to narrow it down. You can select more than one at a time before adding them to the segment.
Custom Scene
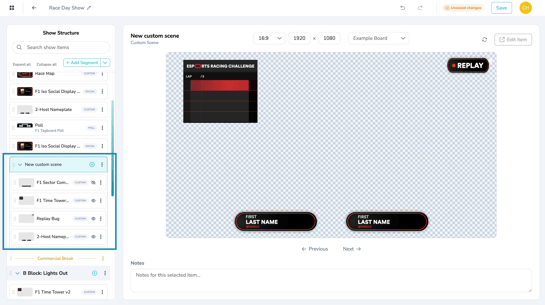
A Custom Scene collates multiple Custom Graphics together so they run as one item, this is what used to be called Graphic Groups.
- Click "Custom Scene" to add one to your Segment.
- Click the "+" on the Custom Scene to add Custom Graphics to it (the same Templates/Existing picker as above, limited to Custom Graphics).
- Drag and drop to reorder the graphics inside the scene, same as reordering any item in a Segment.
Note
Only Custom Graphics can be added to a Custom Scene. Classic Graphics, Social, Poll content, Media, and Markers can't go inside one.
Media
Browse your Design Library folders for images and video. Media is added to the Segment as its own item, it doesn't need to live inside a Graphic first. Unlike the Graphic picker, Media is added one item at a time.
Marker
Add a Marker to flag a point in your rundown. Markers are for reference only, they're not runnable content. Double-click a Marker's name to rename it. To change its color, select it and use the color field that appears in the main panel on the right.
Whatever you choose, it's added to the bottom of the Segment as a new item in your rundown.
The Main Panel
Select any item in your rundown and its preview appears in the main panel to the right of the sidebar, along with an "Edit item" button that jumps straight into that resource's own editor in a new tab. Select a Marker instead and this panel shows its name and color fields rather than a preview.
Reorder and Organize
Reorder Items
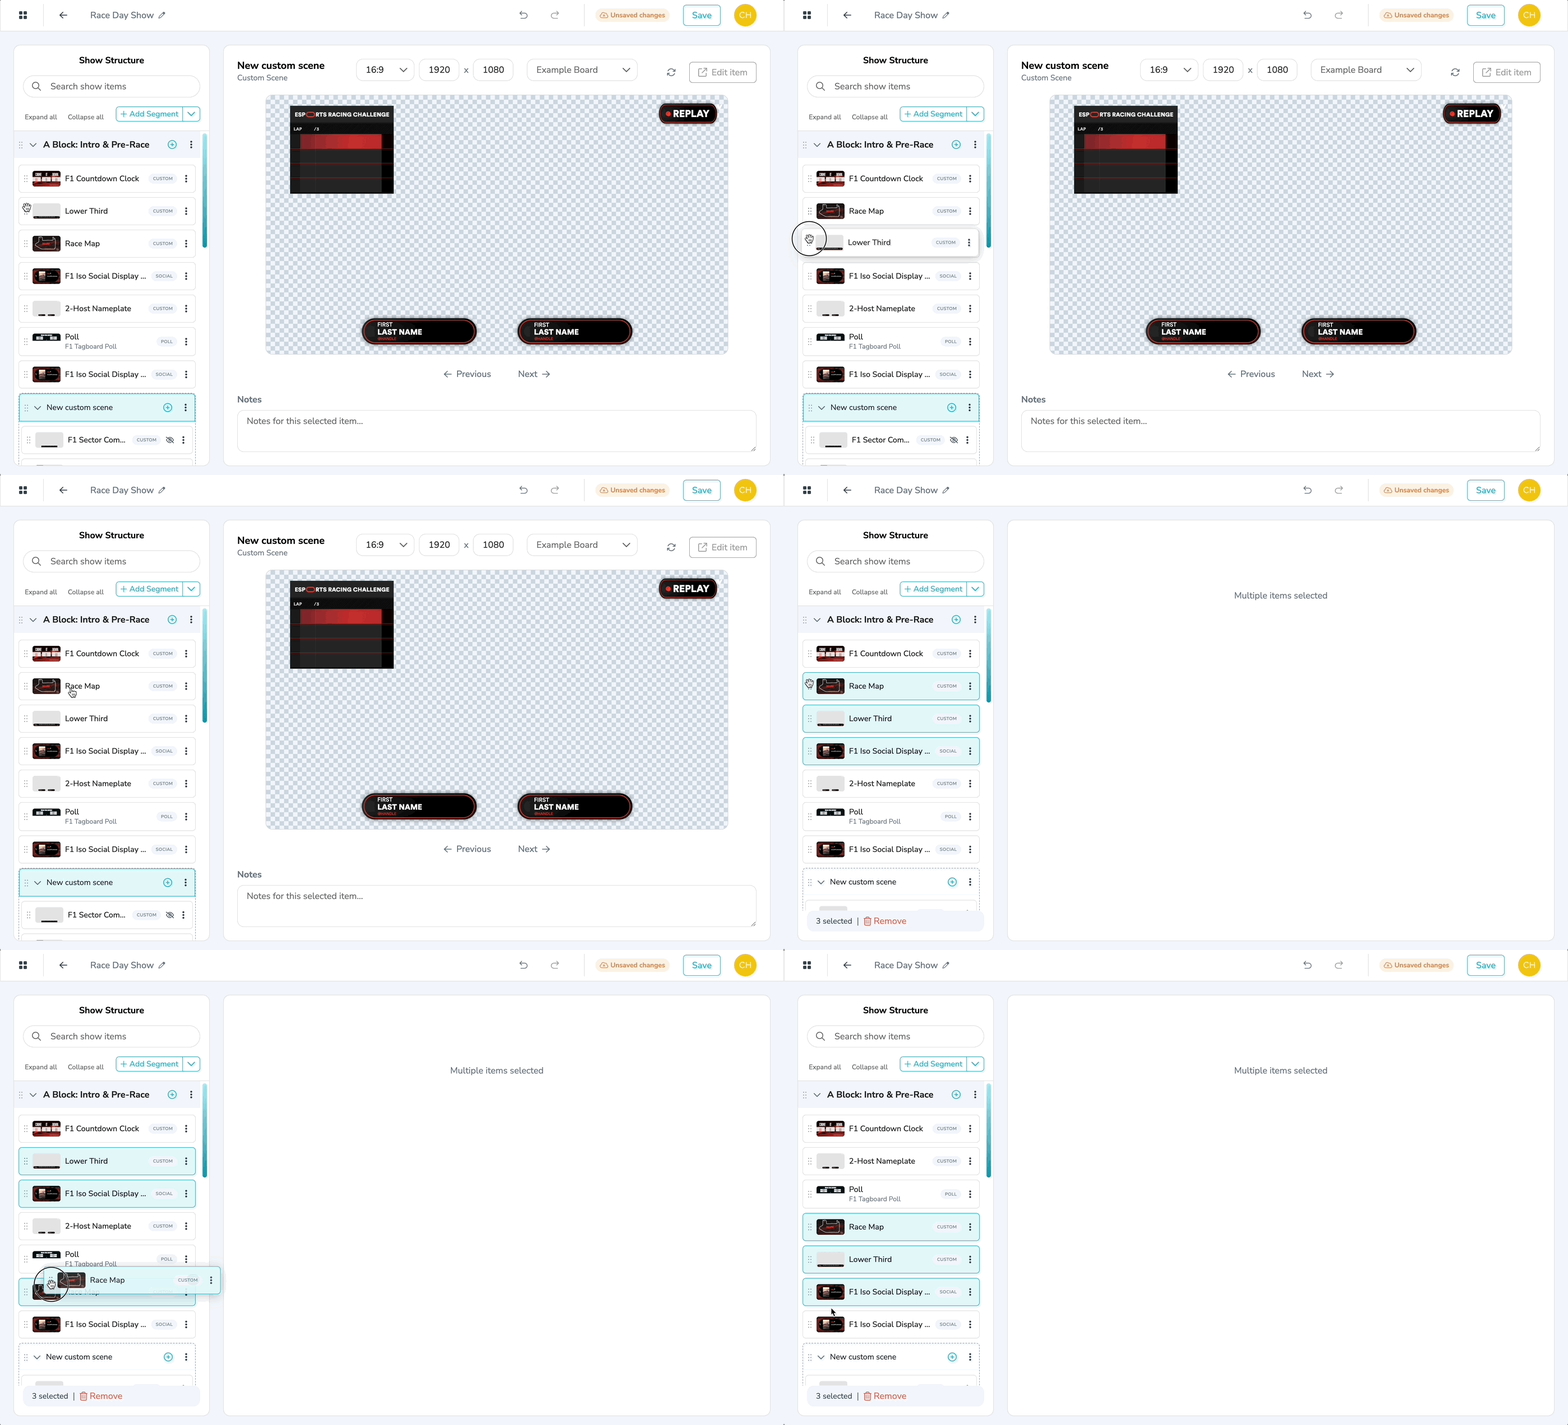
Click and hold the grip-dots on the left side of an item, then drag it up or down within its Segment. To reorder with the keyboard, select an item and press Shift + ↑ / ↓. This moves the item within its current Segment; it won't jump it into a different Segment. (Arrow keys without Shift just move which item is selected, they don't reorder anything.)
Move Items Between Segments
Drag an item out of one Segment and drop it into another. There's no keyboard shortcut for crossing Segments, so this one's drag-only.
Select Multiple Items
Shift+click items to select more than one at a time. Drag any of the selected items and the whole group moves together. A "N selected | Remove" bar appears at the bottom of the sidebar so you can remove them all at once.
Reorder Segments
Segments themselves can be dragged into a new order the same way, or moved with Shift + ↑ / ↓.
Duplicate an Item
Click the three dots on any item (or Segment) and select "Duplicate" to create a copy right below it.
Keyboard Shortcuts
| Action | Shortcut |
|---|---|
| Add Segment | Alt+S (⌥S on Mac) |
| Add Marker (top level) | Alt+M (⌥M on Mac) |
| Add Graphic (in a Segment) | Alt+D (⌥D on Mac) |
| Add Custom Scene (in a Segment) | Alt+G (⌥G on Mac) |
| Add Media (in a Segment) | Alt+E (⌥E on Mac) |
| Add Marker (in a Segment) | Alt+M (⌥M on Mac) |
| Move selected item up/down within its Segment | Shift + ↑ / ↓ |
| Move selection focus up/down | ↑ / ↓ |
| Undo / Redo | Toolbar buttons, top right |
Save Your Show
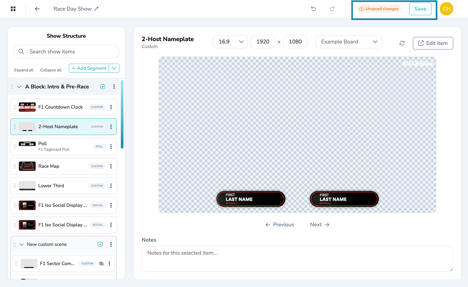
Show Builder doesn't autosave. When you have unsaved changes, a "Save" button and an "Unsaved changes" indicator appear in the top toolbar. Click Save (or wait for "All changes saved" to confirm it went through).
If you try to navigate away with unsaved changes, you'll be prompted to "Save & leave" or "Discard changes." Your show needs to be saved before it'll show up correctly in Producer.
Handle Broken Assets
If a Graphic, Custom Scene, or media file gets deleted somewhere else in Tagboard, its item will show "Item missing or deleted" in red instead of disappearing silently.
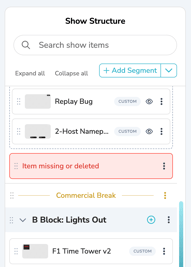
Click the three dots on the item and select "Remove" (it's the only option left for a missing item), then add a replacement through the content picker if you need one.
Send Your Show to Producer
Once your rundown's ready and saved, head into Producer to bring it to life.
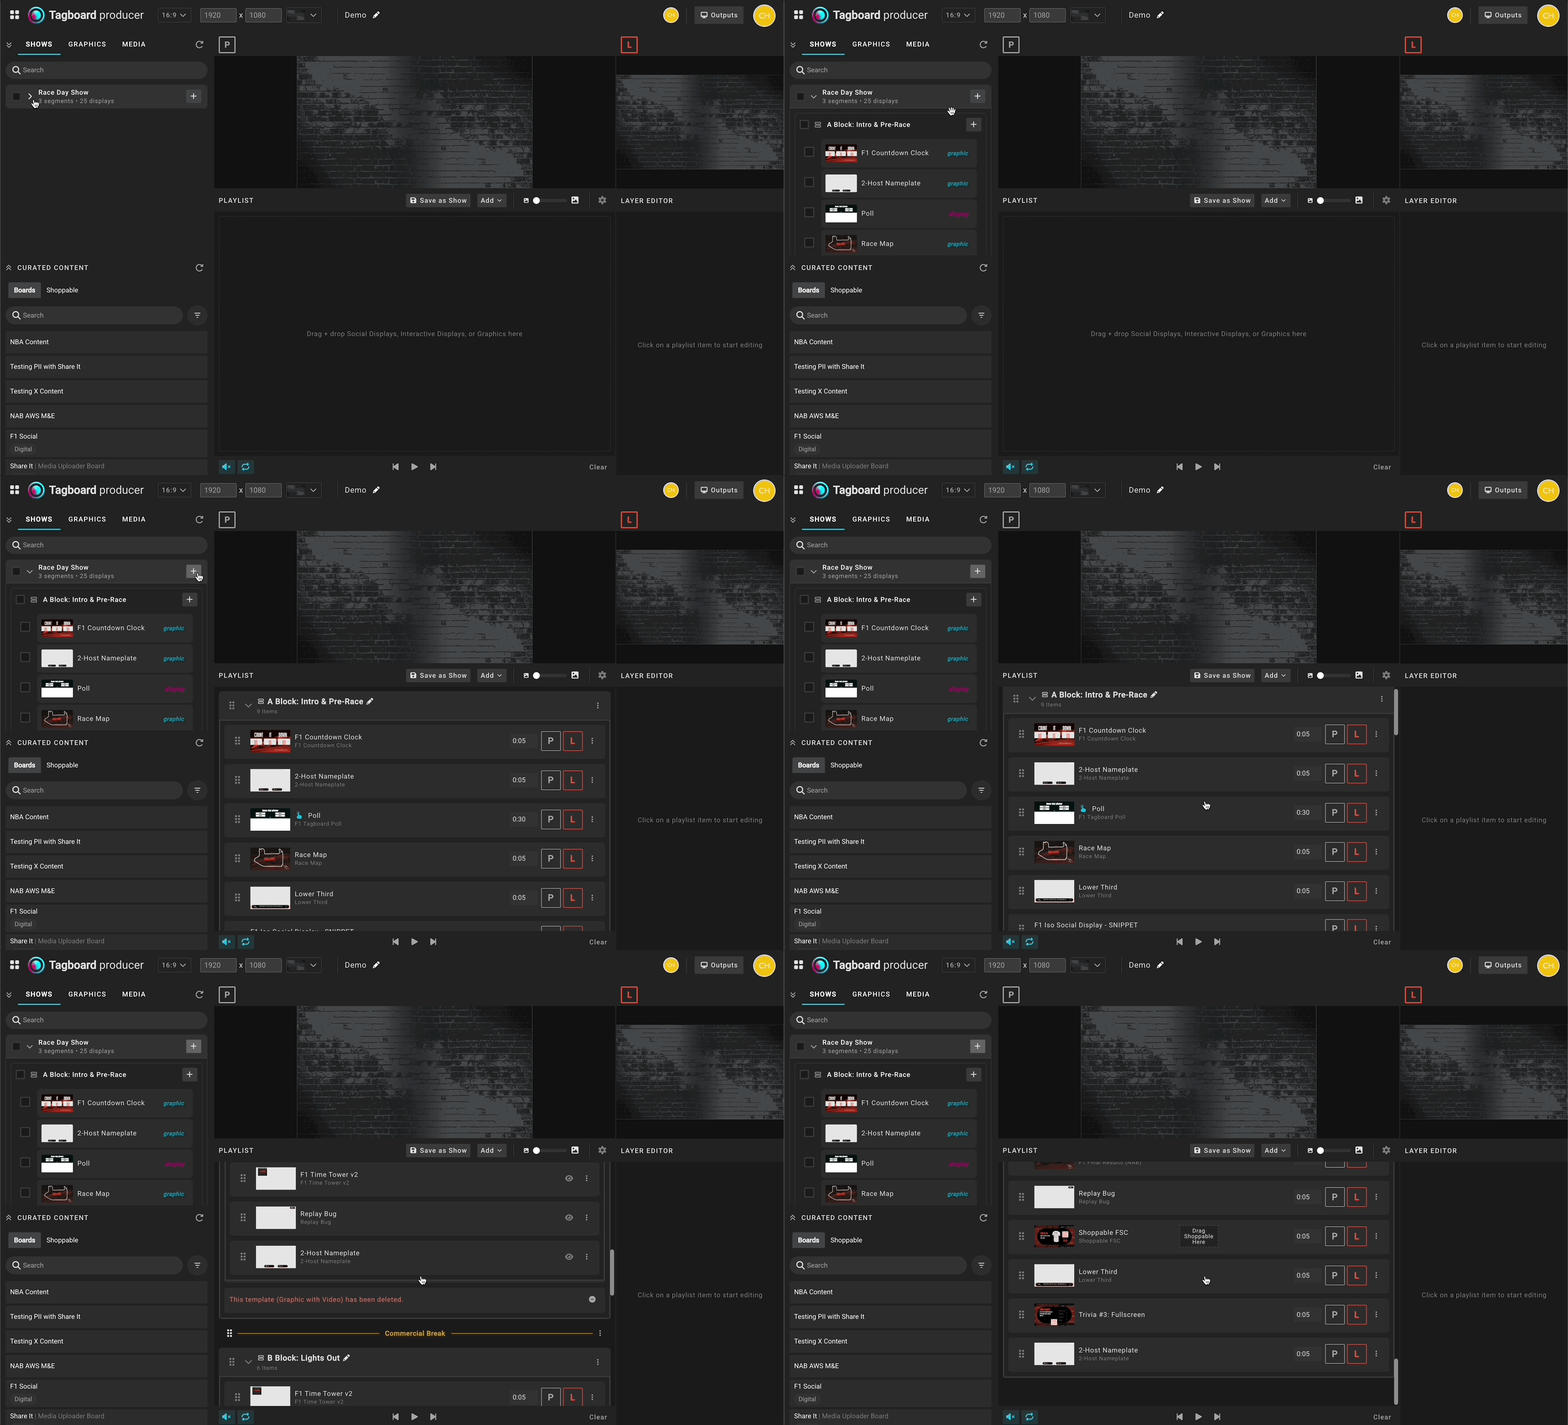
- Open the applications menu and select "Producer." This opens Producer in a new tab.
- Open an existing production, or create a new one.
- Click the "Shows" tab.
- Find your show and add it to the playlist: drag it in, click the "+" icon, or select it and click "Add to Playlist." You can add the whole show at once, or expand it and add a single Segment the same way.