Producing with Graphics
This article will teach you how to add graphic templates to your playlist, edit them right from Producer, and layer them in groups to take multiple live at the same time!
To get started, open a production in Tagboard Producer and click on the 'Graphics' tab in the Asset Library, (located in the upper left). When you click on the Graphics tab, you'll see a list of your graphic templates. Haven't created any yet? Get started here.
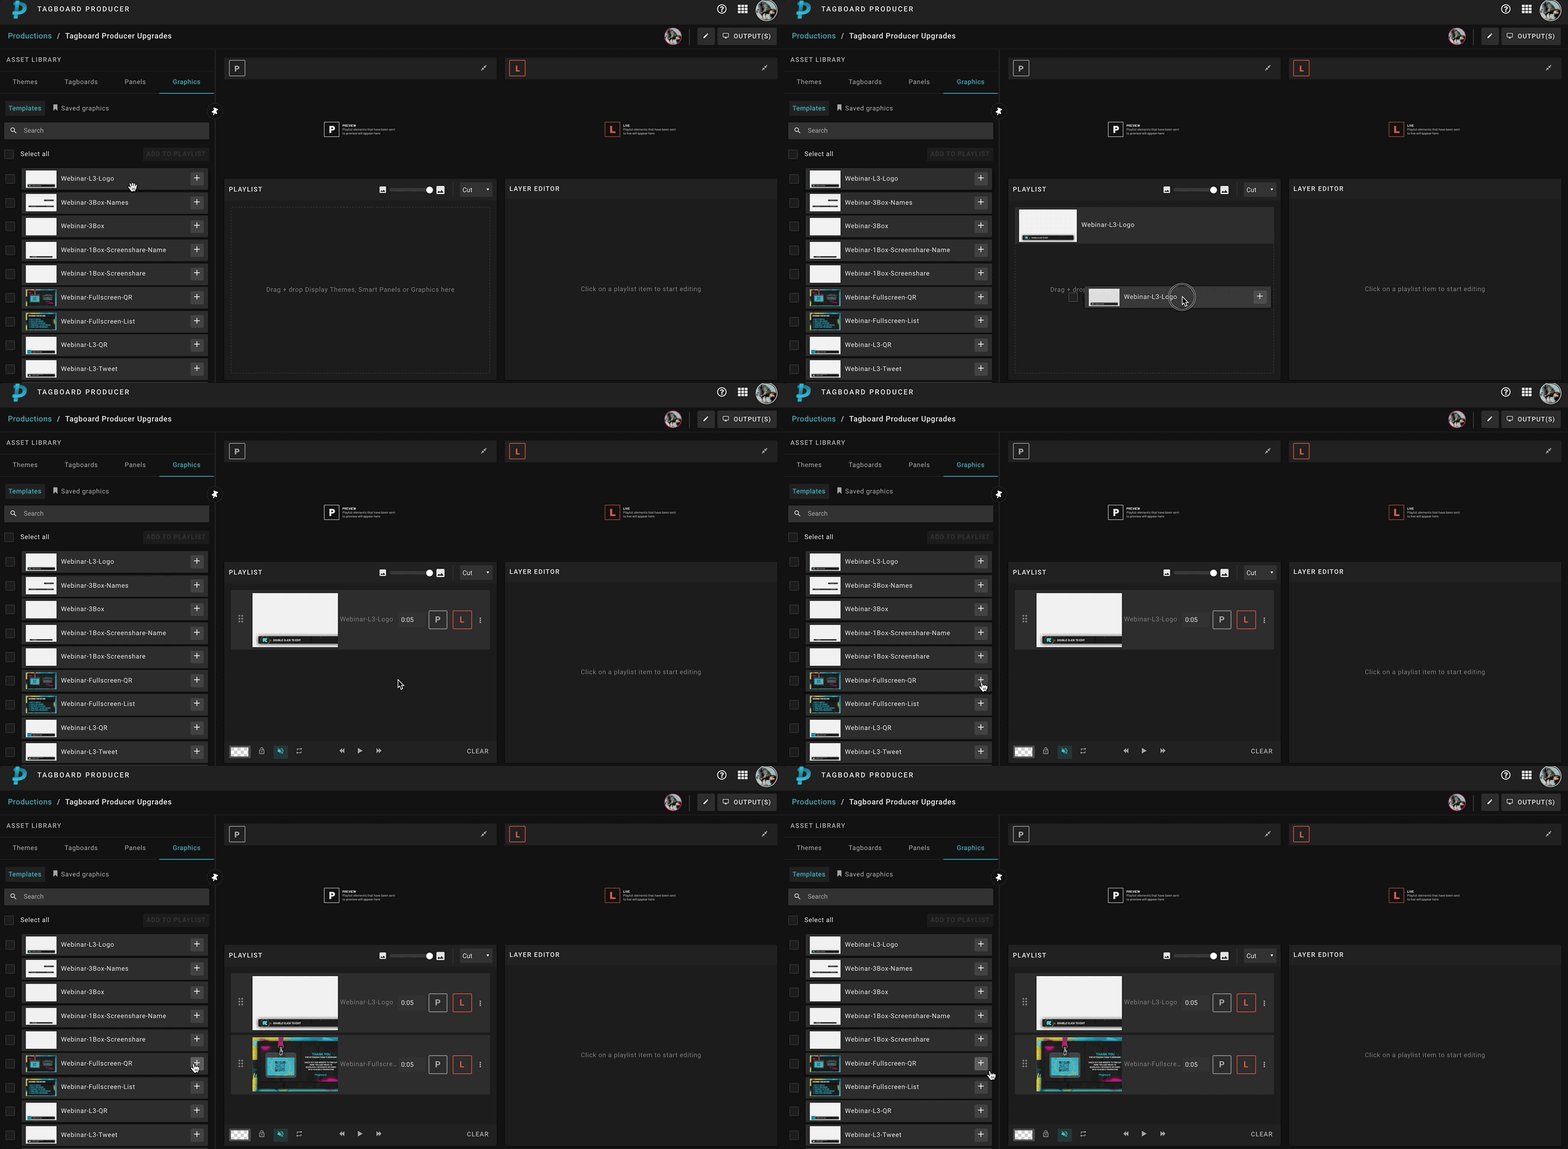
Drag & drop graphic templates onto your playlist. You can also click the '+' button on the right side to automatically add a graphic to the end of your Playlist.
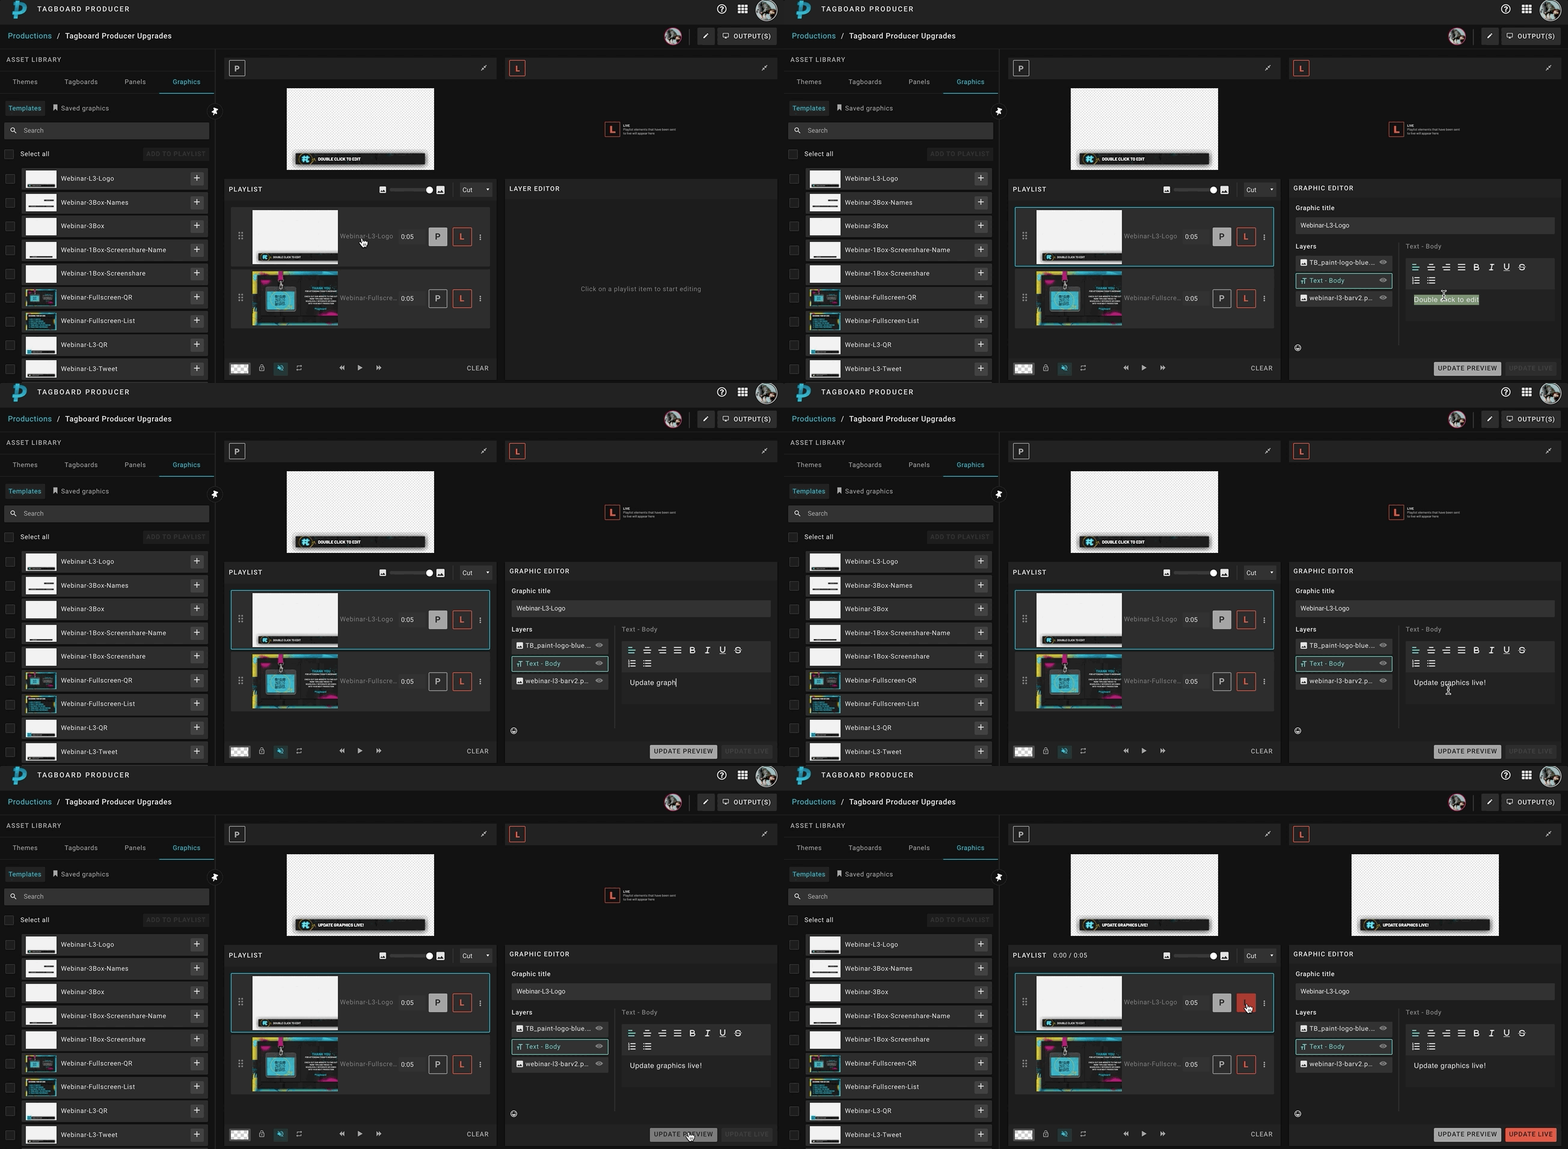
To edit your graphic, click on the graphic in your playlist. This will open that specific graphic in the Graphic Editor on the right.
💡TIP:
Whatever element in your Playlist is currently open in the Layer Editor
will be outlined in blue on the Playlist.
In the Graphic Editor, you can update the graphic title that will be visible on your Playlist, along with any of the layers built into that graphic. Darkened layers are locked and cannot be edited in, (this can be adjusted in the Graphic Builder). Highlighted layers indicate you can edit the text or image.

You can also toggle visibility of each layer on or off, by clicking the eyeball icon on the right. Hidden layers will not appear in that individual graphic. One example where this would be used is if you have a title bar with a "LIVE" or "BREAKING" bug that you may not want displayed all the time.
📣IMPORTANT:
The edits you make to a graphic while it's in your playlist only apply to it while it exists there. Once it's deleted from your playlist, those edits are gone and the graphic defaults back to the original template in your Asset Library.
Saved Graphics
If you are creating graphics in Producer that you do want to save to reuse even after the Playlist is cleared, we recommend using Saved Graphics. This is a great option for graphics that you will use regularly such as a name graphic for your host.
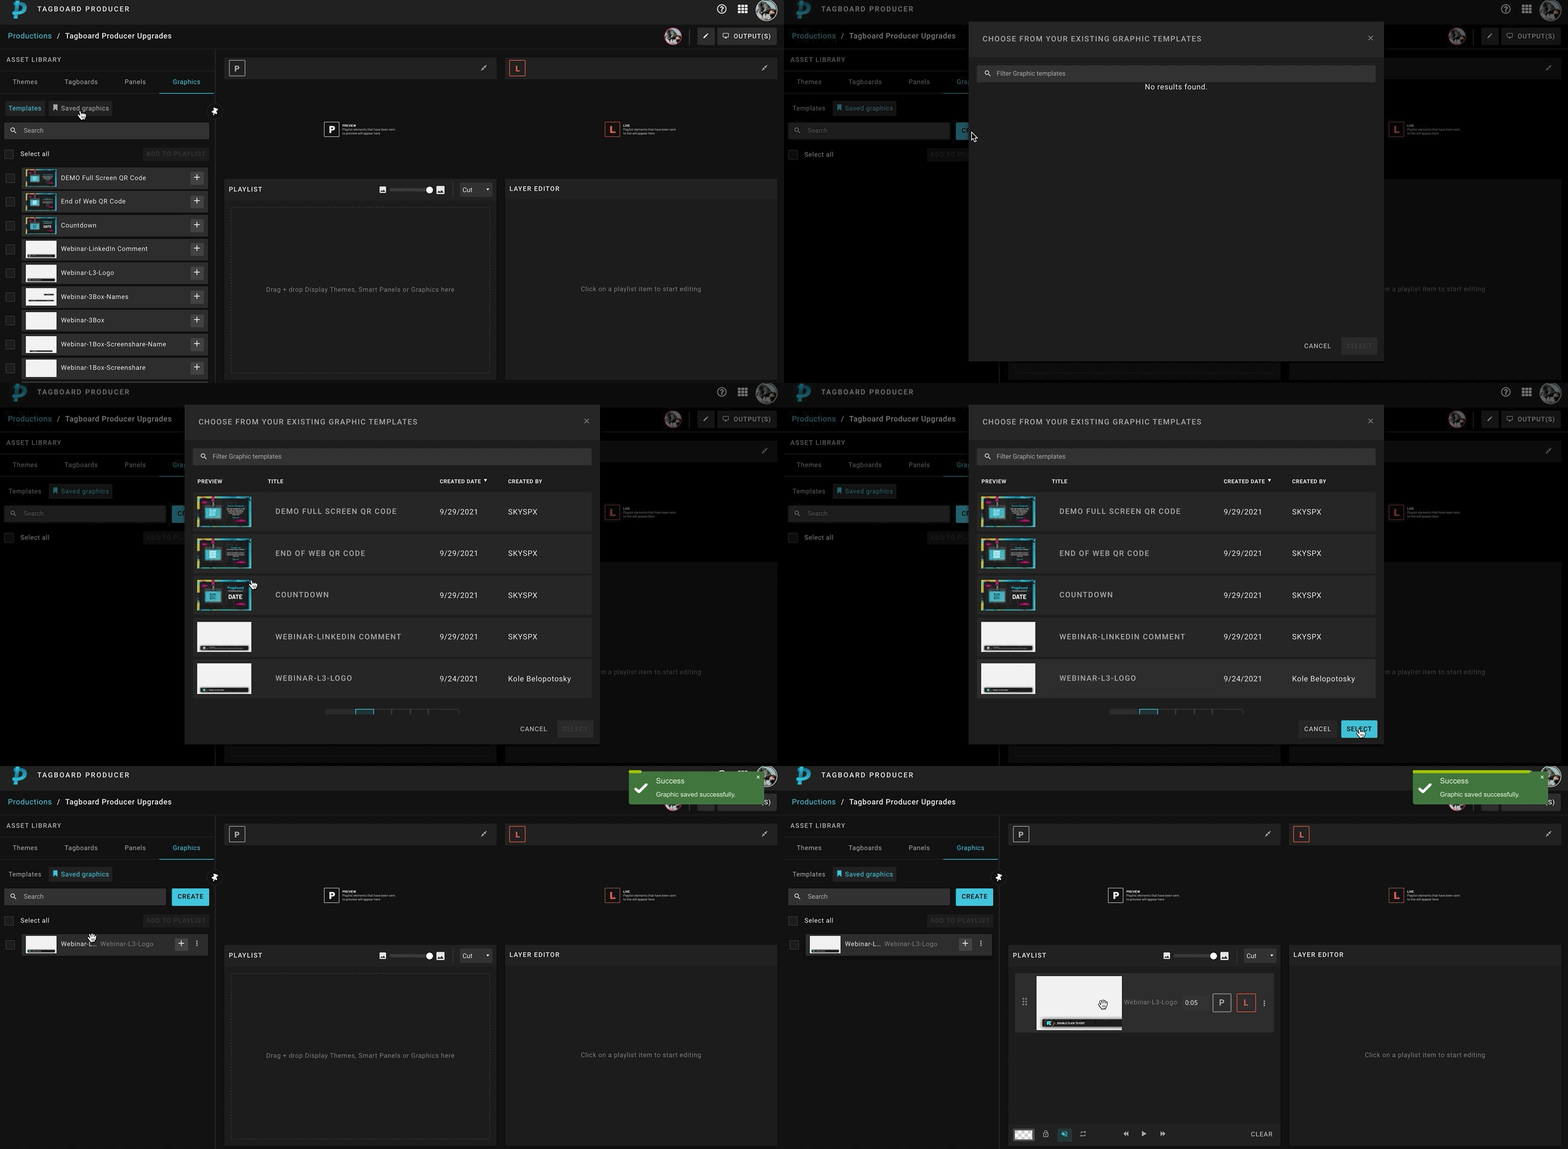
Click on Graphics in your Asset Library and select the 'Saved Graphics' tab. Click the blue 'Create' button and choose the template you'd like to use. This will add a Saved Graphic to your Asset Library that you can drag & drop onto your timeline. Make any desired updates to the title and layers.
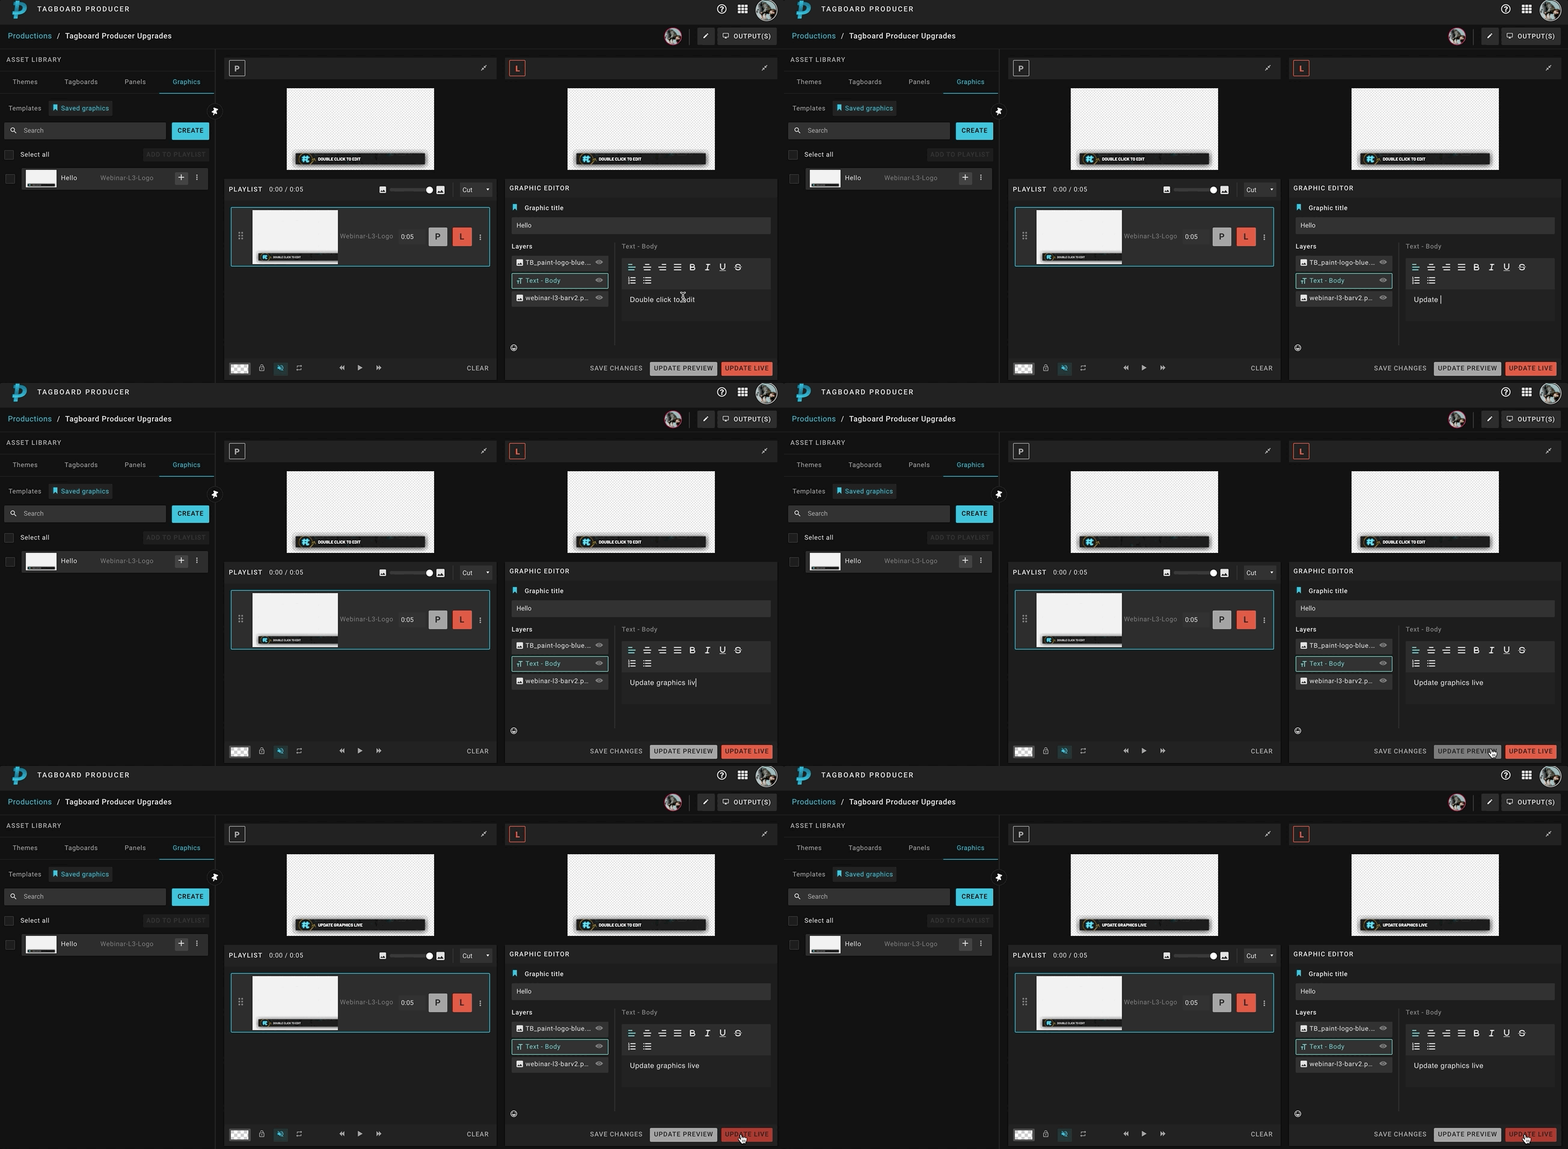
Saved Graphics will be marked with a blue icon. Saved Graphics can be accessed again by clicking on the Saved Graphics tab in your Asset Library, even once the graphic is deleted from your Playlist.

📣IMPORTANT:
Graphics AND Saved Graphics are tied to the production they are built in. If you delete your production, you will delete all of the Graphics currently on your Playlist & Saved Graphics built within it! Your original Graphic Templates will remain.
Displaying your Graphics & Making Live Edits
Click on 'P' to preview your graphic, and ensure if looks exactly the way you want it. Click the 'L' to take the graphic onto your live screen.
You can access the Graphics Editor to make real-time edits to any graphic even while that graphic is in the Preview or Live window. If the graphic is currently in your Preview window, the updates will not be reflected until you click 'Update Preview'. If the graphic is currently in your Live window, the updates will not be reflected until you click 'Update Live'.
If the graphic is not in the Preview or Live window, the changes will be automatically saved. The goal is to save you time (and mouse clicks!) so no need to click save. The changes will automatically take effect the next time that element is on screen.
If you are using a Saved Graphic, you will need to click 'Save Changes' in order to save any changes you make in the layer editor that you want to access later.
Producing with Multiple Graphics
Producers can take multiple graphics live at the same time using 'Groups' in Tagboard Producer. (Note: This is specific to Graphics. Social Displays and Poll Results Displays cannot be added to a group.)
At the top of your Playlist, click ‘Add Group’ to create a new group in your Playlist. Once you add a Group to your playlist, we recommend naming the Group to help keep your Playlist organized.
Next, add graphics to the group. You can do this two ways: drag & drop graphic templates into the group, or select and click the graphics you'd like to add, click the arrow next to 'Add to Playlist', and select the Group.
📣IMPORTANT
The layer hierarchy of graphics in a Group is important. The top-most Graphic will layer on top of everything beneath it. So if graphic has to always be on-screen, then it must be on the top of the list, and a static background layer should be at the bottom of the Group.
Once your graphics are added to a Group, you can take that Group to Preview or Live. You can show or hide each graphic in a Group by simply toggling the eye icon of each graphic on & off.
If you are simply toggling Graphic on & off, it's a one-click change by toggling the eye icon. If the Group is currently in Preview or Live, the change will take effect immediately. (See the GIF below!)
If you want to make changes to a Graphic, you can use the Layer Editor. Click on any graphic template, edit layers using the Layer Editor window, and save those changes by clicking 'Update Preview' or 'Update Live'.
A few additional notes:
-
You can add as many Groups as you need to produce
-
You can minimize your Groups to make your Playlist more manageable! Click on the arrow to the left of the title.
-
You can reorder your Groups by clicking on the 6 dots on the far left, and dragging and dropping.
-
Click on the 3-dotted menu on the right side of each group to Duplicate & Merge Groups:
-
"Merge up" will appear only if there is a Graphic or group of Graphics above the Group. When selected, it will merge with what is above.
-
"Merge Down" will appear only if there is a Graphic or group of Graphics below the Group. When selected, it will merge with the asset below.
-
Have questions on how to get your Tagboard story live on your screen?
Check "Live Display Technical Requirements" and/or "Manage Live Display Output(s)".
.png?width=300&height=50&name=kb-logo-alt%20(1).png)


