Visualize the real-time results of a native X, formerly Twitter, Poll.
X Polls are a great way to interact with your audience and bring their voice into your production. Whether you are asking for input to drive future coverage, having a vote on jersey combinations for the next game, or hosting real-time trivia... the opportunities are endless. These polls offer simple one-click voting for your audience. With Tagboard, you can visualize the real-time results in a Smart Panel.
For more information on creating a X poll on X, visit X's "About X Polls" help article here.
Follow the steps below for bringing your X Poll to life within Tagboard.
STEP 1 - Create Your X Poll
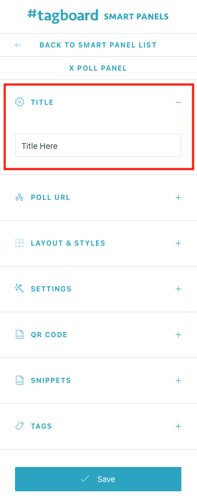
Start by titling your X Poll Smart Panel in the upper left corner. This title will appear in your Smart Panel library and will be one way you can find it in the future. [Tags are the other, which will be discussed in Step 4.]
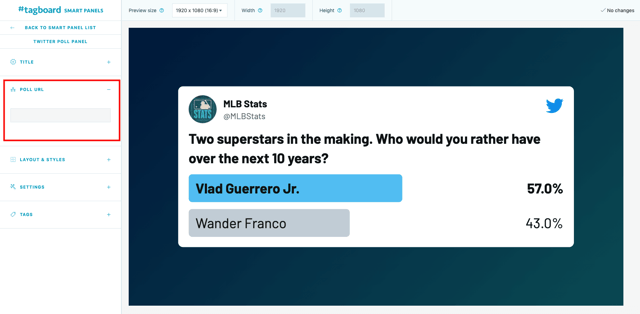
After giving your X Poll a title, you'll move to the "Poll URL" menu. Here you will begin by finding the poll on X that you want to visualize, then copy and paste the direct URL link for the poll into the text field of the builder. The X Poll will automatically populate in the preview window. Now you can begin to customize how your viewers will interact with and see your real-time poll by following the remaining steps.
STEP 2 - Customize the Look
Layout & Styles
Once you've entered the X Poll URL, you can then customize your Panel. Choose between two layout options: fullscreen or lower third.
Then you can format your background using the below options:
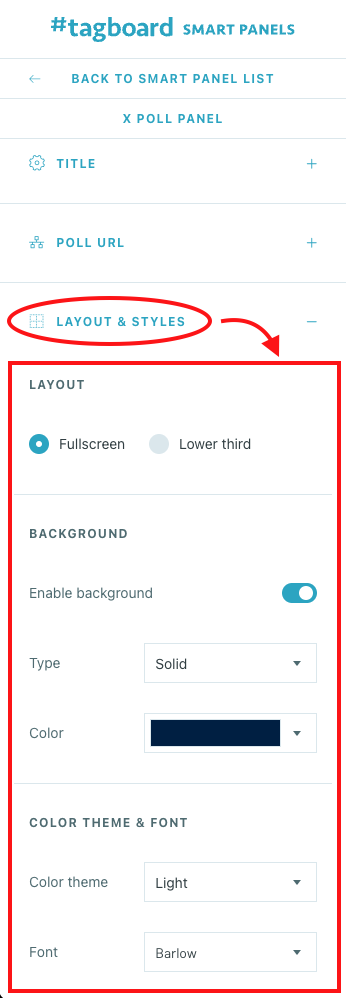
- Enable Background: The background is enabled by default. If you toggle the background off, the X Poll will be on a transparent background.
- Tip: you'll want to toggle the background off if you're going to embed the X Poll onto a website where you want to keep the background of the webpage.
- Type: If the background is enabled, choose between a (1) solid color, (2) gradient, (3) image, or (4) video.
- Color, Color 1, Color 2, and Direction: [if applicable] all pertain to the background if you have selected either Gradient or Solid as the Type [mentioned above] from the dropdown.
- Color Theme & Font: choose from several options for ways to change the look and feel of your X Poll. "Custom" allows you to completely customize the color scheme.
Lastly, you'll be able to insert a logo within the Logo section! This could be your logo or a sponsor logo. After adding a logo, you can adjust the size and placement of it.
- Note: If you're trying to make an adjustment that you cannot figure out, then reference the Snippets section, below, or contact your Customer Success Manager. Unsure who this is? Then email Success@tagboard.com with a detailed request.
Settings
-
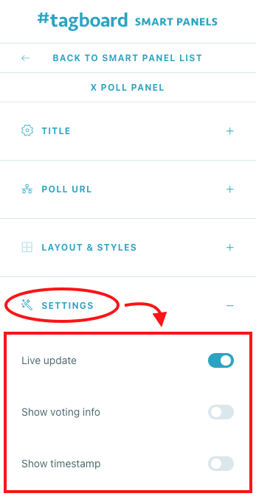
Live Update: When live update is turned on, the X Poll will update on your Panel in real time as users vote. (Tip: The results will update constantly at regular intervals, that are no longer than 30 seconds apart. If you want to see movement while your poll is live on your screen, keep this in mind as you plan your rundown!)
-
Show Voting Info: Toggle on if you want to display the total number of votes on the poll. It will also display whether the poll is still open or if it has ended.
-
Show Timestamp: Toggle on to display the date and time of when the poll was posted on X.
QR Code
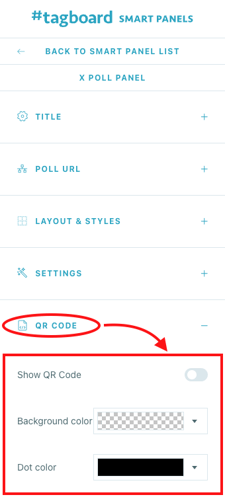
You have the ability to add a QR Code on your X Poll by simply toggling on ‘Show QR Code’. Toggling on will automatically insert a QR Code that leads directly to the X Poll you’d like viewers to vote on.
You can also change the background and dot color within the QR Code section to keep it on-brand.
Snippets (optional)
If you need a visualization that is more custom than the above options allow for in the Smart Panel Builder, the Tagboard team is happy to help! Reach out to your dedicated Client Success Manager to get started. Unsure of who this is? Then email Success@tagboard.com with a detailed request.
Have you already worked with our team to build custom visualizations? The Snippets tab on the left sidebar of the builder is where you can apply those customizations to your Smart Panel. Select "Add Snippets" and there will be a list of customizations to apply.
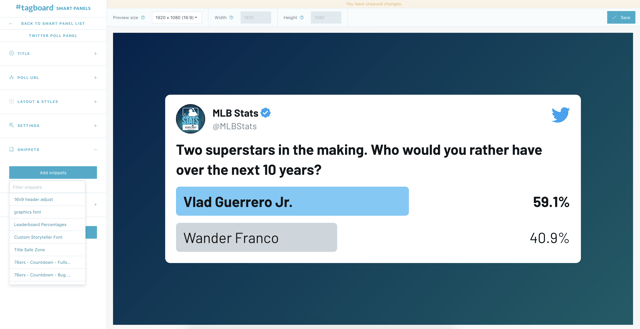
When you add a Snippet, you are applying custom code to that visualization. Snippets can be used to customize every type of Smart Panel. If you are adding a Snippet to an Interactive Poll Smart Panel, be sure to add a Snippet that was built for that specific type of Panel in order for the CSS to apply properly.
Note:
You also have the ability to remove a Snippet, which will remove custom code from that visualization.
STEP 4 - Saving & Tagging
Once you have customized your X Poll, add appropriate tags in the "Tags" menu in the bottom left corner. This is to make your Panel easier to search and access from the Panels dashboard in the future.
Click 'Save' in the upper right or bottom left corner. Now you're ready to add this asset into your playlist in Producer and go live. You could also embed your X Poll into your digital experience!
